
The following instructions will walk you through configuring SAML through Azure AD for Exoprise. Once configured you’ll be able to create user accounts with Single Sign-on enabled as well as launch Exoprise directly from https://myapps.Microsoft.com
Create SAML Application in Azure
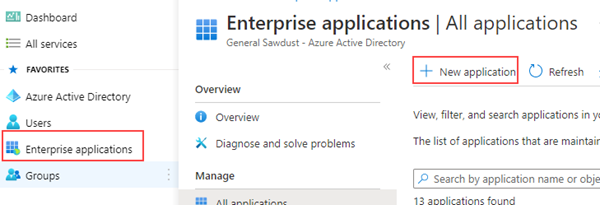
- First, log in to your Azure Active Directory Admin Center, and on the left-hand menu, select Enterprise Applications.
- Select New Application.
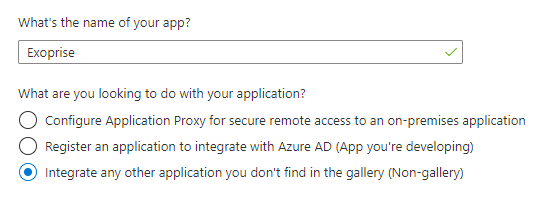
- From the Azure AD Gallery, select “Create your own application”.
- Input the Application Name of “Exoprise” and select Integrate any other application you don’t find in the gallery (Non-Gallery) and click Create at the bottom.
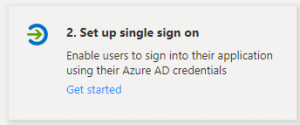
- This will bring you into the Application, select “Set up Single Sign-on” and then “SAML”.
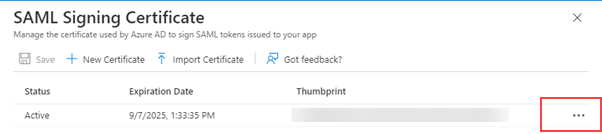
- In the SAML Certificates section, click Edit and in the top right of the SAML Signing Certificate window, click on the 3 dots next to the Thumbprint and select “Pem Certificate download”.
- Once the file is downloaded, right-click on it and select “Open With” and select “Notepad”.
- Close the “SAML Signing Certificate” popup window and in the application find the Setup Exoprise section and copy the Login URL to a notepad file.
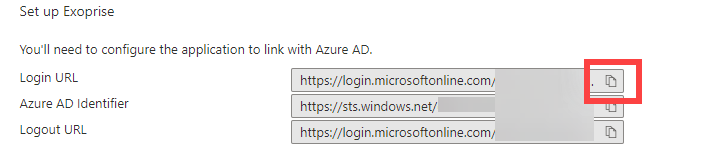
- You should now have the Certificate pem file as well as the login URL stored.
- Leave the Azure Active Directory Portal up as you will return to this page.
Configuring SAML in Exoprise
- Log in to the Exoprise SAML Setup Page and select “Add SAML Configuration”.
- From the Add SAML Configuration page, provide the label you’d like to use.
- In the Issuer/Identifier field copy the following.
https://secure.exoprise.com/saml/metadata/
- Add the Label/Key to the end of the above URL as seen in the following screenshot.
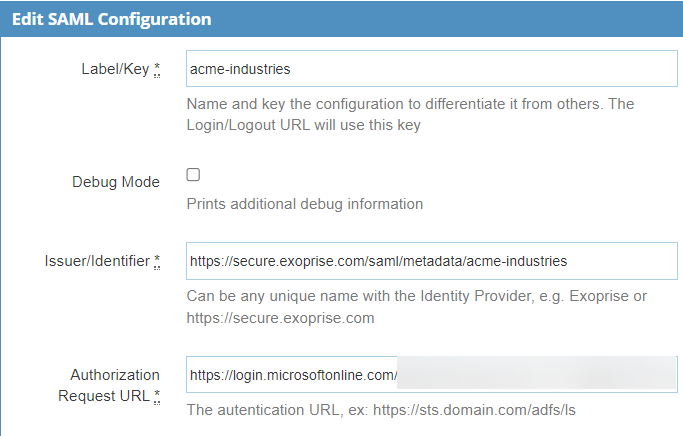
- Copy the Login URL you copied to Notepad and paste it into the Authorization Request URL.
- Copy the Contents of the Certificate .pem file into the x.509 Certificate.
- You can configure Automatic Provisioning of the accounts by checking “Automatically Provision” and selecting a “Default Role for Provisioned User” This will automatically assign the users created with this SAML configuration the specified Role in Exoprise.
- Once complete, click Update SAML Configuration which will return you to the “SAML Configurations” where you can see the new configuration you created. Copy the Login, Metadata, and Consume URLs to your notepad.
SAML Configuration in Azure
- Back in the Azure Admin Center, return to your application by selecting “Enterprise Applications” on the left and then selecting Exoprise.
- From the Overview, select Set up Single Sign on as you did before.
- Click the edit button for the Basic SAML Configuration.
- From the Add SAML Configuration page, provide the label you’d like to use.
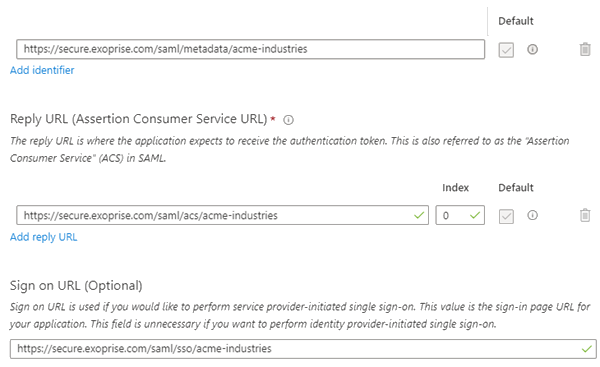
- In the Basic SAML Configuration popup window, copy and paste the Metadata URL from Exoprise into the Identifier (Entity ID) field.
- Copy the Consume URL from Exoprise into the Reply URL (Assertion Consumer Service URL).
- Copy the Login URL from Exoprise into the Sign on URL (Optional) field.
- Click Save in the top left of the popup window.
Adding users via SAML
- From the Azure Active Directory Admin Portal, select Enterprise Applications then select Exorpise.
- Select Users and Groups on the left menu.
- Click Add User/Group at the top and select the users you want to add.
- In Exoprise, select Admin and then Users from the left-hand menu.
- In the Invite New User section at the bottom, input the email address of the user in the To field.
- Next, select the Organization Role you want the user to have.
- Select the SAML Configuration from the “Use Single Sign On” dropdown.
- Click Send.
- Once complete, the user will be able to log in to https://myapps.Microsoft.com and launch Exoprise directly from there.
Branding the Application in Azure
- First, right-click on the following screenshot and save it as a png.
![]()
- In the Azure Admin Center Portal, select “Properties” for the Exoprise Application, and in the Logo section, click on the Folder and point it to the image you just downloaded.
- Click Save in the top left of the Properties.
- When a user logs in to https://myapps.Microsoft.com, Exoprise will now be branded.