
The following steps will guide you through deploying a CloudReady Synthetic to a site. You have the option of deploying Private or Public sensors which are both covered in these documents Private Site and Public Site. Please note that some sensors can only be deployed to Private Sites.
Prerequisites
- Each type of Synthetic may require different accounts and different types of permissions assigned to them. For example, the Teams, Exchange, and Sharepoint synthetics will require a tenant admin to elevate the account being used by the Exoprise bot. This only needs to be done once and the permissions are stated by Microsoft. The Before You Begin page will cover the permissions required more thoroughly.
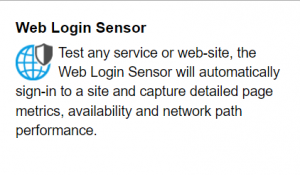
- In this walkthrough, we’ll be deploying a Web Login Sensor, this synthetic will test logging into a web page and provide you with performance metrics on the transaction itself. You can deploy whichever sensor you would like but make note that the installation Wizard may be slightly different and require additional credentials.
- Since we will be deploying to a Private Site you will want to run the Exoprise Management Client from the Site, to deploy a Private Site you can follow the instructions from the Deploying a Private Site page.
Deploying a Sensor
Log In
- First, log in to the Exoprise Management Client from the machine designated as a Private Site.
- Once logged in, go to Sensors and then Add Sensor from the left-hand menu.
- Select WebLogin Sensor.
Introduction
- From the Introduction screen, click Next to get to the Prerequisites.
Prerequisites
- This prerequisites check is run from the machine and verifies what the Sensor needs to run is installed. Once complete, click Next.
Choose a URL
- On the Choose an URL page, you’ll want to put in the information of the service you want to login to. For our example, we’ll be using Secure.Exoprise.com.

- Once you have filled the information in, click Next.
Validation
- The Exoprise Management Client will attempt to run the sensor and verify it can log in. You’ll receive an error if it fails along with a screenshot of what and where the sensor errored.

- Once it completes successfully, click Next.
Alarm Setup
- Once in the Alarm Setup page, you can choose how long you want the Sensor to run before configuring Alarms. The thresholds set on these Alarms will be based on the performance metrics over the period you choose.
- You can also select to have the Alarms created for everything, errors only, or performance. Outage Alarms will be created no matter what.
- You can also choose how long you want the Sensor to run in an Errored State before disabling itself until the issue is resolved.
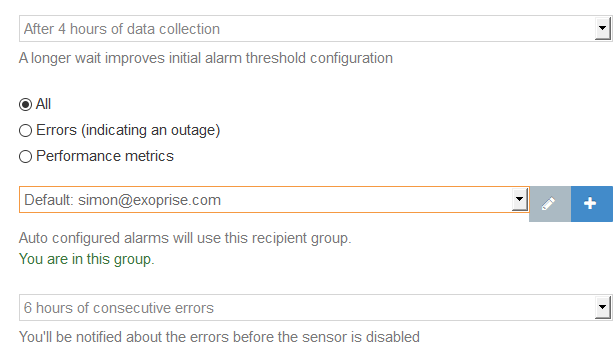
- Once complete, select Next to get to the Deployment screen.
Deploy
- From the Deploy screen, you can select how often you want the Synthetic to run, for this Sensor 5 minutes should be fine but others may require tuning.
- You can also select a Display Name and Provide notes as to why it is in place.
- At the bottom, select your Site to deploy to and click Finish.
Dashboards and Sensor
- Once the Sensor deployment is complete, you will be taken to the Dashboards view.
- You’ll be able to see the Sensors in the Heatmap of the Overview Dashboard.
- To navigate to the sensor, you can right-click it from the Heatmap and click on the link at the top of the popup menu.
- You can also go to Sensors then Navigation to go directly to it from the left-hand menu.
- The Sensor will collect data every time it runs, if there aren’t metrics showing, you’ll need to give it time.