
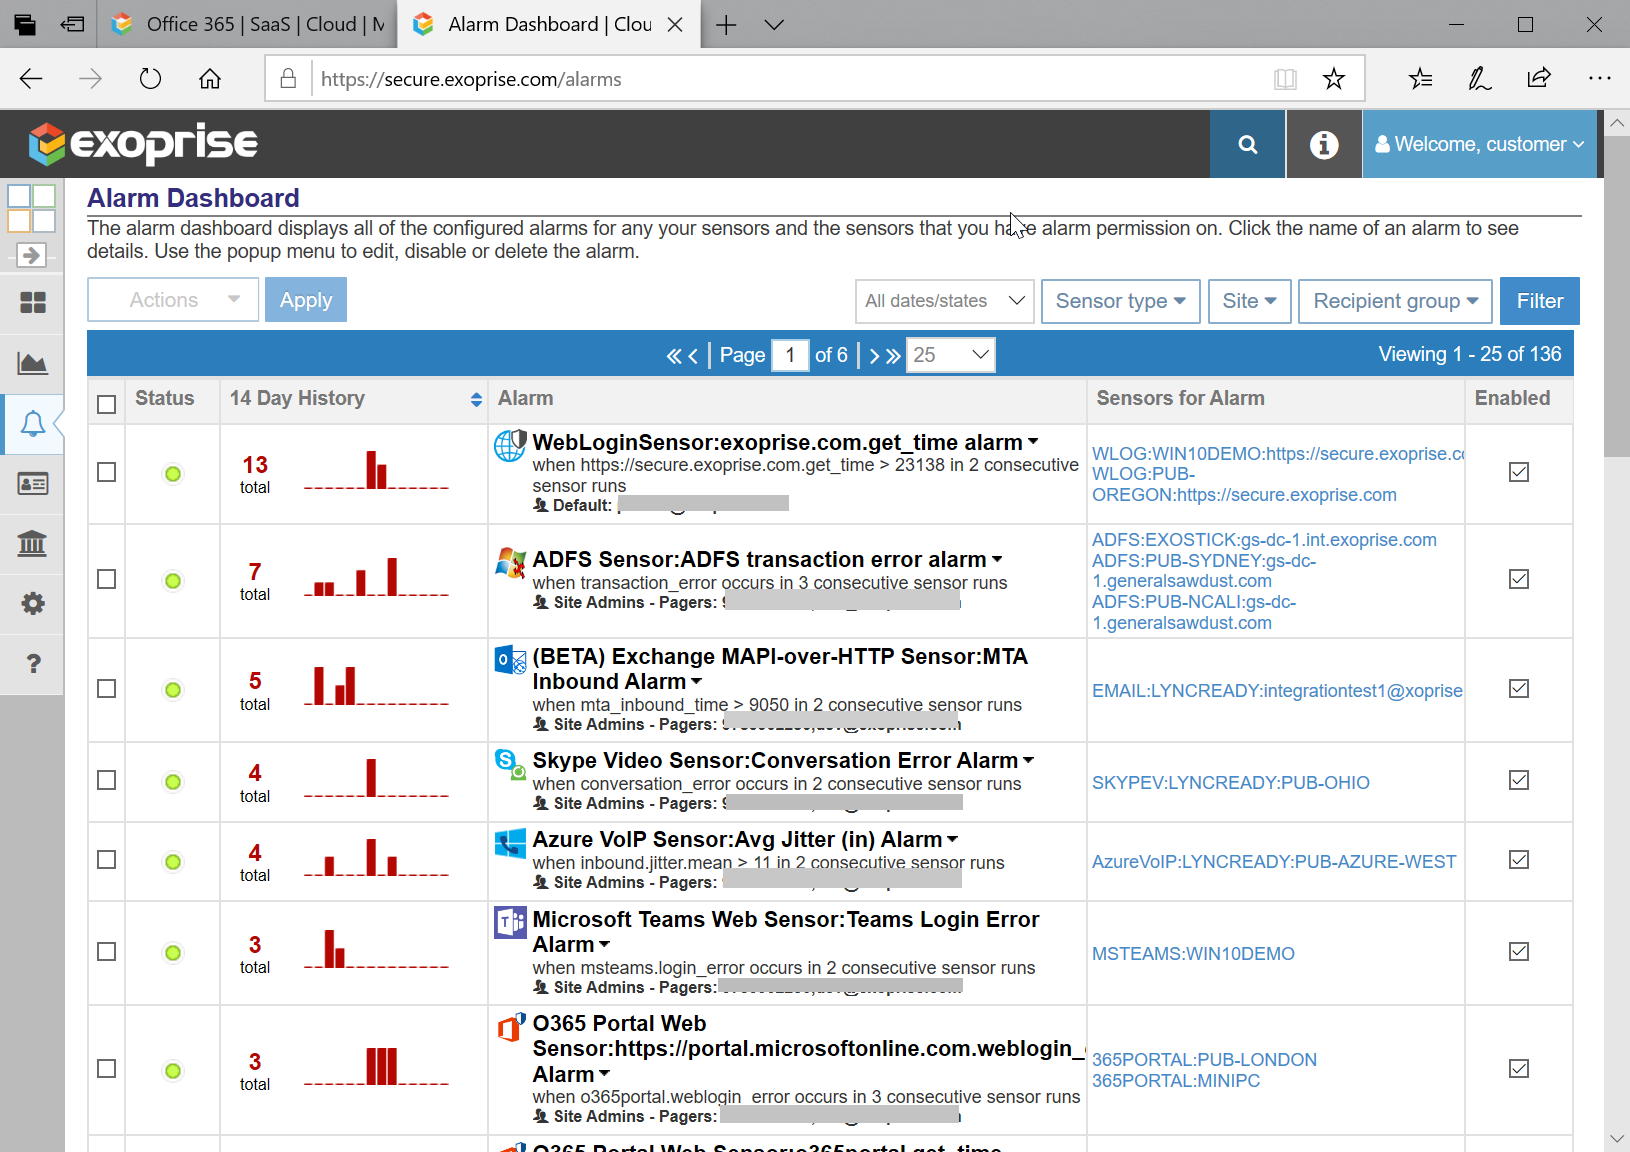
You manage alarms for your Organization and deployed sensors from the Alarm Dashboard. The alarm dashboard enables you to see all of the alarms that you have permissions for and to see various elements about the alarms including its history of events.
Alarm Elements
-
- Checkbox
The first column enables you to select the alarm for performing operations - Status
The status column indicates whether the alarm is enabled or disabled - History
The history column displays a per-day bar chart or sparkline of the number of times an alarm has been rung - Alarm
This is the overall description of the alarm. The first row is the title of the alarm which can be adjusted during alarm setup. The second row gives the textual description of the alarm and its conditions. The third row details the alarm recipient group for the alarm - Sensors for Alarm
This column displays the sensors that the alarm is attached to. - Enabled
This column indicates whether the alarm is enabled or disabled. Uncheck to disable the alarm
- Checkbox
Filter Alarms
Filter the alarm dashboard by sensor types, sites, recipient groups and more in the upper right of the alarm dashboard. Filter the dashboard to alarms that have rung within the past 7, 14, 30 days in the first drop down. Once you’ve changed your filters, click the Filter button to apply the settings.
See Details
To show more details of an alarm and a history of when the alarm has been rung, click the title of the alarm in the ‘Alarm’ column (the first row). This navigates to the Alarm page history page where you can see the events for the alarm and perform more operations on an individual alarm.
Edit Alarm
From the alarm dashboard, hover over the alarm title in the Alarm field and click the ‘Edit’ option of the menu. You will navigate to the ‘Edit Alarm’ page for the alarm where you can adjust the parameters, sensors, titles and other parameters of an alarm.
Perform Operations on Multiple Alarms
To perform operations on multiple alarms, select the alarms from by clicking on a row or selecting the checkbox in the first column. Once you’ve selected the alarms, click the action dropdown in the upper left:
Enable/Disable
Enables or disables groups of alarms and then click apply.
Tune Up
To reduce the frequency of alarms click ‘Tune Up’ and then click apply. Read more about Alarm Tuning
Tune Down
To increase the sensitivity of alarms, click ‘Tune Down’ and then click apply. Read more about Alarm Tuning.
Delete
To delete the alarms that you’ve selected, click Delete and then click apply. Confirm that you would like to delete the alarms.
Set Recipient Group
To change the recipient group for the selected alarms, choose ‘Set Recipient Group’. From the dropdown list of recipient groups, choose a new group to apply to the alarms and then click apply. You can also edit, add and delete recipient groups from the controls to the right of the recipient group dropdown.